
Troubleshooting your Craftsman 1/2 HP garage door opener can save time and money. This guide helps identify common issues like a non-working motor, door not closing, or remote control problems. Whether you’re dealing with a chain, belt, or smart model, these steps will help you diagnose and fix problems efficiently, ensuring smooth operation and safety.
Common Issues
The Craftsman 1/2 HP garage door opener often faces issues like a non-working motor, door not closing, or remote control problems. These frequent challenges can disrupt daily use. Understanding the root causes, such as misaligned sensors or power supply issues, is key to resolving them effectively and ensuring smooth operation.
Motor Not Working
If your Craftsman 1/2 HP garage door opener’s motor isn’t working, it can be frustrating and disrupt your daily routine. This issue often stems from power supply problems, such as a tripped circuit breaker or a blown fuse. Start by checking your home’s electrical panel to ensure the breaker hasn’t tripped or a fuse hasn’t blown. If the power supply is stable, the next step is to inspect the motor itself.
Ensure the motor is properly plugged into a functioning outlet. Sometimes, the motor might be unplugged due to accidental disconnection. If the motor still doesn’t work, check for any obstructions blocking the garage door’s path, as this can prevent the motor from operating. Clearing debris or aligning the door correctly might resolve the issue.
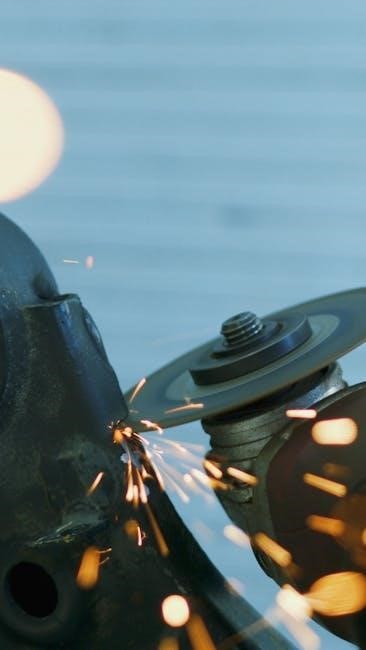
Another common cause is misaligned or faulty safety sensors. If the sensors detect an obstruction, they can prevent the motor from running. Inspect the sensors for proper alignment and clean them if necessary. If the problem persists, it may indicate a more serious issue, such as a faulty motor capacitor or worn-out gears. In such cases, consulting a professional or replacing the motor might be necessary.
Regular maintenance can help prevent motor issues. Lubricate moving parts and ensure all connections are secure. If you’ve tried these steps and the motor still doesn’t work, it may be time to consider a replacement. Always prioritize safety when working with electrical components and follow the manufacturer’s guidelines for troubleshooting and repairs.

Door Not Closing
If your Craftsman 1/2 HP garage door opener’s door isn’t closing, it can be a significant inconvenience. This issue often arises due to obstructions in the door’s path or misaligned safety sensors. Start by visually inspecting the garage door track and floor for debris, such as dirt, leaves, or small objects, which may block the door from closing properly. Clearing these obstructions can often resolve the problem.
Next, check the safety sensors located near the floor on both sides of the garage door. Ensure they are properly aligned and free from dirt or cobwebs. If the sensors are misaligned, the door may refuse to close as a safety precaution. Gently adjust the sensors to ensure they are pointing directly at each other and test the door again.
Another potential cause is a broken or worn-out garage door spring. If the spring is damaged, the door may not have the necessary tension to close completely. Inspect the springs for visible signs of wear or damage. If you find any issues, consider replacing the springs or consulting a professional for assistance.
Additionally, check the door’s rollers and hinges for proper function. Worn-out rollers can prevent the door from moving smoothly along the track. Lubricate the rollers and hinges with a silicone-based spray to ensure smooth operation. If the problem persists, it may be necessary to replace these components.

Finally, ensure the garage door opener’s limit settings are correctly calibrated. If the settings are off, the door may not close fully. Refer to your owner’s manual for instructions on adjusting the limit settings. Regular maintenance, such as lubricating moving parts and inspecting for wear, can help prevent issues like this from occurring in the future.

Remote Control Problems
Remote control issues are among the most common problems with the Craftsman 1/2 HP garage door opener. If your remote isn’t working, the first step is to check the batteries. Weak or dead batteries can prevent the remote from transmitting signals properly. Replace the batteries with new ones of the correct type, ensuring they are installed correctly.
If the remote still doesn’t work after replacing the batteries, interference from other devices could be the culprit. Other wireless devices in your home, such as cordless phones or neighboring garage door openers, may be causing signal interference. Try moving these devices away from the garage or switching to a different frequency band if possible.
Another potential issue is misalignment or damage to the remote’s infrared sensor. Inspect the sensor for dirt or obstructions and clean it gently with a soft cloth. If the sensor is damaged, it may need to be replaced. Additionally, ensure the remote is programmed correctly to your garage door opener. If you’ve recently replaced the remote or moved, reprogramming may be necessary. Refer to your owner’s manual for specific instructions on how to reset or reprogram the remote.
Finally, check for any blockages between the remote and the garage door opener’s receiver. Objects or obstacles can block the signal, preventing the remote from functioning. Move any items that could be interfering with the signal path and test the remote again. Regular maintenance, such as cleaning the sensors and ensuring proper alignment, can help prevent remote control issues in the future.
Essential Tools and Safety Tips
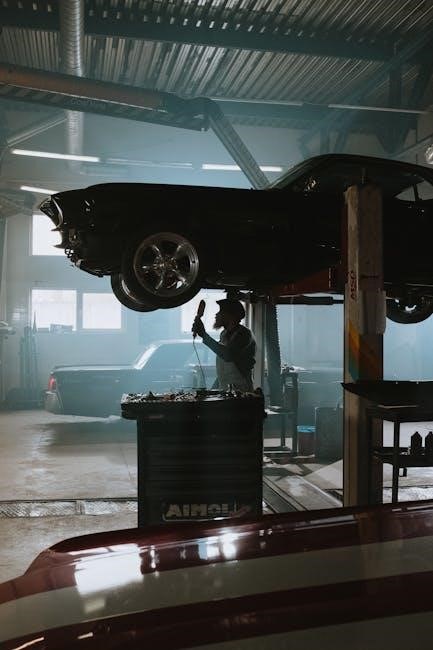
Before attempting to troubleshoot or repair your Craftsman 1/2 HP garage door opener, it’s important to gather the right tools and follow safety guidelines. Having the necessary tools on hand will save time and ensure you can address issues effectively. A screwdriver set, wrench, and pliers are essential for adjusting or tightening components. Additionally, a multimeter can help check for power supply issues or faulty wiring.
Safety should always be your top priority. Disconnect the power supply to the garage door opener before performing any repairs. This prevents accidental start-ups or electrical shocks. Wear protective gear, such as gloves and safety glasses, to protect yourself from sharp edges or flying debris. Never attempt to repair the garage door while it is in motion or under tension, as this can lead to serious injury.
Regular maintenance is key to preventing issues. Lubricate moving parts, such as rollers and hinges, to ensure smooth operation. Clean the sensors and tracks to avoid misalignment or obstruction. If you’re unsure about a repair, consult the owner’s manual or contact a professional. Remember, a well-maintained garage door opener not only lasts longer but also operates more safely and efficiently.
By being prepared with the right tools and following safety precautions, you can confidently address common problems and keep your garage door functioning properly. Always prioritize caution and take your time when working with electrical or mechanical components.

Motor Troubleshooting
Identify motor issues by checking power supply, worn belts, or chain tension. Ensure sensors are aligned and free from obstructions. If the motor overheats, allow it to cool before restarting. For continuous operation, inspect the limit switches and adjust them if necessary. Always disconnect power before performing repairs for safety.
Motor Not Starting
If your Craftsman 1/2 HP garage door opener motor isn’t starting, begin by checking the power supply. Ensure the unit is properly plugged in and that no circuit breakers or fuses have tripped. Verify that the remote control or wall switch is functioning correctly, as weak or dead batteries in the remote can prevent the motor from activating.
Next, inspect the safety sensors. Misaligned or obstructed sensors can prevent the motor from starting. Clean the sensors with a soft cloth and ensure they are properly aligned. If an object is blocking the door’s path, remove it to allow the motor to operate smoothly.
Check for worn or damaged belts or chains, as these can prevent the motor from engaging. Lubricate moving parts if necessary. If the issue persists, consult the owner’s manual for specific troubleshooting steps or consider resetting the motor according to the manufacturer’s instructions.
Remember to always disconnect power before performing any repairs to ensure your safety. If none of these steps resolve the issue, it may be time to contact a professional or replace faulty components.

Motor Overheating
If your Craftsman 1/2 HP garage door opener motor is overheating, it’s essential to address the issue promptly to prevent damage. Overheating can occur due to excessive use, obstructed airflow, or mechanical friction. Start by turning off the motor and allowing it to cool down completely before further use.
Check for any obstructions blocking the motor’s ventilation slots, as poor airflow can cause overheating. Clean the motor housing with a soft brush or cloth to remove dust or debris. Ensure the garage door is properly aligned, as misalignment can strain the motor and lead to increased heat production.
Lubricate the moving parts, such as the chain or belt, to reduce friction. Worn or damaged components can also contribute to overheating, so inspect the drive system for signs of wear and replace any faulty parts. If the motor continues to overheat after these steps, consult the owner’s manual for specific troubleshooting guidance or consider resetting the motor.

Remember, frequent overheating may indicate a deeper issue, such as a malfunctioning capacitor or overloaded circuit. If the problem persists, it’s advisable to contact a professional technician to avoid further damage or safety hazards.
Motor Running Continuously
If your Craftsman 1/2 HP garage door opener motor is running continuously, it could indicate a malfunction in the system. This issue often occurs due to misaligned safety sensors, faulty limit switches, or a malfunctioning control board. Start by checking the safety sensors to ensure they are properly aligned and free from obstructions.
Next, inspect the limit switches, which control the door’s opening and closing limits. If these switches are adjusted incorrectly, the motor may run non-stop. Refer to your owner’s manual to adjust the switches properly. Additionally, check for any blockages in the door’s path, as these can cause the motor to run continuously.
If the issue persists, examine the control board for signs of damage or wear. A faulty control board may send continuous signals to the motor. In such cases, replacing the control board or consulting a professional may be necessary. It’s also important to ensure the garage door is properly balanced, as an unbalanced door can strain the motor and lead to continuous operation.
Finally, check the power supply and wiring for any damage or loose connections. A short circuit or faulty wiring can cause the motor to run uncontrollably. If you’re unsure about any step, it’s recommended to consult a professional technician to resolve the issue safely and effectively.
Remote Control Troubleshooting

Remote control issues are common with the Craftsman 1/2 HP garage door opener. Start by checking the batteries, as dead or weak batteries often cause non-responsiveness. Ensure the remote is properly programmed and free from signal interference. If problems persist, reprogram the remote following the manufacturer’s instructions or consult the user manual for guidance.
Checking Remote Batteries
One of the most common issues with the Craftsman 1/2 HP garage door opener is remote control malfunction. Often, this problem can be resolved by simply checking the remote batteries. Over time, batteries lose their charge, leading to weak or intermittent signals. To address this, open the battery compartment on the back of the remote and inspect the batteries for corrosion or wear. Replace them with new, high-quality batteries of the correct type (usually AAA or AA). Ensure the batteries are installed correctly, following the polarity markings in the compartment. After replacing the batteries, test the remote by pressing the open or close button. If the garage door responds, the issue is resolved. If not, proceed to check for other potential problems such as signal interference or programming issues. Regularly maintaining the remote batteries can prevent unexpected malfunctions and ensure consistent performance of your garage door opener.
Remote Signal Interference
Remote signal interference is a common issue that can prevent your Craftsman 1/2 HP garage door opener from responding to commands. This problem often arises when other electronic devices in your home or neighborhood are emitting signals on the same frequency as your garage door opener. Devices such as cordless phones, Wi-Fi routers, and neighboring garage door openers can interfere with the remote’s signal, causing inconsistent or failed operation.
To address this, start by checking for potential sources of interference. Move other electronic devices away from the garage door opener or switch them off temporarily to see if the remote works properly. If the issue persists, consider changing the frequency of your garage door opener. Craftsman models often allow you to adjust the frequency by replacing a small dial or switch located on the motor unit. Refer to your owner’s manual for specific instructions.
Another solution is to install a signal booster or upgrade to a garage door opener with rolling code technology, which reduces interference by constantly changing the signal. Additionally, ensure there are no obstructions between the remote and the opener, as physical barriers can weaken the signal strength. If none of these steps resolve the issue, it may be necessary to reprogram the remote or consult a professional for further assistance.
Addressing remote signal interference promptly ensures reliable operation and enhances your overall garage door experience.
Reprogramming the Remote
Reprogramming your Craftsman 1/2 HP garage door opener remote is a straightforward process that can resolve issues like non-responsiveness or interference. This step is often necessary after replacing the remote, installing a new motor unit, or experiencing signal interference. To reprogram the remote, start by ensuring the remote has fresh batteries and is within range of the opener.
Locate the “Learn” or “Program” button on the motor unit, usually found near the antenna or on the side panel. Press and hold this button until the indicator light begins to blink, indicating the opener is in programming mode. Next, press and hold the remote control button you wish to program. Hold it for about 3 seconds until the opener’s light stops blinking, confirming the sync.
Test the remote to ensure it works properly. If it doesn’t, repeat the process, ensuring the remote is within range and the motor unit is in programming mode. For models with multiple buttons, repeat the process for each button you wish to program. If issues persist, consult your owner’s manual for specific instructions, as programming steps may vary slightly between models.
Reprogramming the remote ensures seamless communication between the remote and the motor unit, eliminating issues caused by signal misalignment or interference. This step is a quick and effective way to restore functionality without needing advanced tools or professional assistance.

Safety Sensors Issues
Safety sensors are crucial for preventing accidents. Misaligned or dirty sensors can cause the door to malfunction. Check for obstructions and ensure sensors are properly aligned. Clean the lenses with a soft cloth and verify the LED lights are steady. If issues persist, consult the manual for realignment instructions or consider replacing faulty sensors.
Misaligned Sensors
Misaligned safety sensors are a common issue with garage door openers, including the Craftsman 1/2 HP model. These sensors, located near the floor on either side of the garage door, detect obstacles and prevent accidents by stopping the door from closing if something is in the way. If the sensors are misaligned, the door may refuse to close or operate erratically.
To identify misaligned sensors, check the LED lights on each sensor. If the lights are blinking or not illuminated, it indicates a problem. Start by ensuring the sensors are clean and free of dirt or debris, as this can interfere with their operation. Use a soft cloth to wipe the lenses clean.
Next, verify that the sensors are properly aligned. They should be pointing directly at each other and securely fastened to the garage floor. If they appear loose, tighten the mounting brackets. If the sensors are still misaligned after cleaning and tightening, you may need to adjust their position slightly until the LED lights stabilize.
After realigning the sensors, test the garage door by attempting to close it. If it operates smoothly, the issue is resolved. If the problem persists, consider consulting the owner’s manual or contacting a professional for further assistance. Properly aligned sensors are essential for safe and reliable garage door operation.